
ADVERTISEMENT
Step-by-Step Instructions
Step 1: Prepare the Area
Before you begin, clear the area of any furniture or items that may obstruct your cleaning process. It’s also a good idea to sweep or vacuum the floor to remove loose dirt and debris.
Step 2: Mix the Cleaning Solution
While you can use hydrogen peroxide on its own, combining it with baking soda can enhance its stain-fighting power. Here’s how to create the cleaning solution:
- In a small bowl, mix 1 cup of hydrogen peroxide with 1/2 cup of baking soda to create a paste. This mixture can help tackle tougher stains.
- If you prefer a spray application, you can use hydrogen peroxide directly in a spray bottle without mixing.
Step 3: Apply the Solution
- Using a Spray Bottle: Spray the hydrogen peroxide solution directly onto the grout lines, ensuring they are thoroughly saturated. Allow it to sit for 5-10 minutes to penetrate the stains.
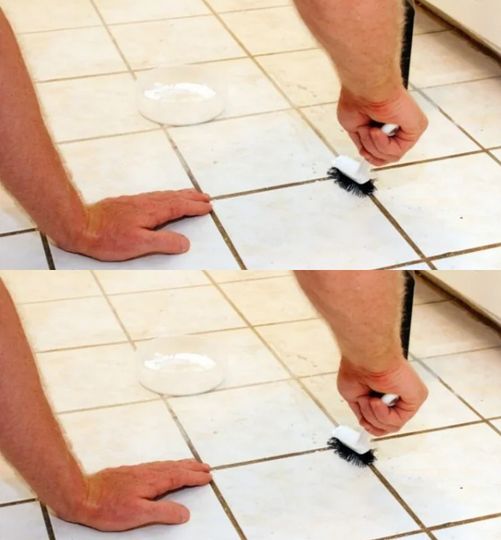
- Using a Brush: If you’ve made a paste with baking soda, use an old toothbrush or grout brush to apply the paste directly onto the grout lines. Use gentle scrubbing motions to cover the stained areas.
Step 4: Scrub the Grout
After allowing the solution to sit, use the toothbrush or grout brush to scrub the grout lines. Focus on particularly stained areas, applying more solution if needed. The combination of scrubbing and the oxidizing properties of hydrogen peroxide will lift the stains.
Step 5: Rinse the Area
Once you’ve scrubbed the grout, it’s time to rinse. Use a clean cloth or sponge dampened with water to wipe away the hydrogen peroxide solution and any loosened dirt. Make sure to rinse thoroughly to avoid any residue.
Step 6: Dry the Grout
After rinsing, dry the grout with a clean towel or paper towels to remove any moisture. This will help prevent new stains and mold from developing.
Tips for Best Results
- Regular Maintenance: To keep your grout looking fresh, consider applying hydrogen peroxide every few months, or as needed.
- Spot Test: Always perform a spot test in an inconspicuous area to ensure that the hydrogen peroxide does not discolor your tiles.
- Avoid Acidic Cleaners: Steer clear of vinegar or acidic cleaners, as they can damage the grout and tile surfaces over time.
- Use Gloves: If you have sensitive skin, wearing gloves can protect your hands from any irritation.
Conclusion
Whitening grout with hydrogen peroxide is an easy and effective solution that can breathe new life into your tiled surfaces. By following these simple steps, you can tackle stubborn stains and enjoy a cleaner, brighter space. Not only will your grout look fabulous, but your entire home will feel fresher and more inviting. Say goodbye to dull, dingy grout and hello to a sparkling clean finish!