ADVERTISEMENT
Instructions
Step 1: Prepare the Dough
- Activate the yeast: In a small bowl, combine the warm water, sugar, and yeast. Stir gently and let it sit for about 5-10 minutes, or until the mixture becomes frothy. This indicates that the yeast is active and ready to use.
- Mix the dry ingredients: In a large bowl, combine the flour and salt. Stir well to distribute the salt evenly.
- Combine wet and dry ingredients: Add the yeast mixture and olive oil to the flour mixture. Stir with a wooden spoon or use your hands to form a rough dough. If the dough feels too dry, add a little more warm water, one tablespoon at a time, until it comes together.
Step 2: Knead the Dough
- Turn the dough out onto a floured surface: Knead the dough for about 8-10 minutes, or until it becomes smooth and elastic. If the dough is sticky, dust it with a little extra flour as needed.
- First rise: Place the dough in a lightly greased bowl, cover it with a damp cloth or plastic wrap, and let it rise in a warm place for about 1-1.5 hours, or until it has doubled in size.
Step 3: Shape the Dough
- Punch down the dough: After the first rise, gently punch down the dough to release any air bubbles. Turn it out onto a lightly floured surface.
- Shape the loaf: Shape the dough into a loaf by folding the sides towards the center and rolling it tightly from top to bottom. Place the shaped loaf into a greased 9×5-inch loaf pan, seam side down.
Step 4: Final Rise
- Second rise: Cover the loaf pan with a cloth and let it rise for another 30-45 minutes, or until the dough has risen slightly above the edge of the pan.
Step 5: Bake
- Preheat the oven: While the dough is rising, preheat your oven to 375°F (190°C).
- Bake the bread: Place the loaf in the preheated oven and bake for 30-35 minutes, or until the top is golden brown and the bread sounds hollow when tapped on the bottom.
- Cool: Remove the loaf from the pan and let it cool on a wire rack before slicing.
Tips for the Best Non-Sourdough Bread
- Use fresh yeast: Make sure your yeast is not expired for the best rise.
- Accurate water temperature: The water should be warm, but not hot. Temperatures over 120°F can kill the yeast.
- Avoid over-flouring: When kneading, use just enough flour to prevent sticking. Too much can make the bread dense.
- Let it cool completely: Allow the bread to cool fully on a wire rack before slicing to avoid a gummy texture.
Why This Recipe Works
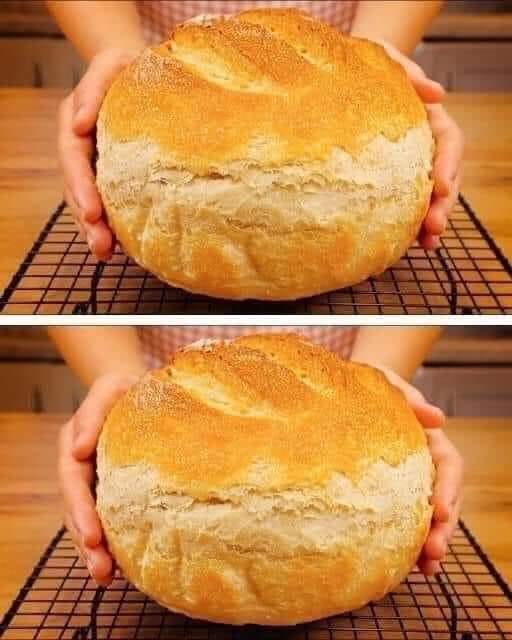
The simplicity of this Non-Sourdough Bread recipe is what makes it so appealing. The combination of basic ingredients results in a soft, tender crumb with a slightly chewy crust. The yeast provides the necessary lift, while the warm water and sugar help activate the yeast quickly for a nice rise. The dough’s multiple rises ensure the bread is airy and light without the need for complicated sourdough starters or long fermentation times.
Delicious Ways to Enjoy Non-Sourdough Bread
- Toast with butter and jam: A classic breakfast or snack option that showcases the bread’s simple flavor.
- Sandwiches: Perfect for grilled cheese, BLTs, or any of your favorite sandwich recipes.
- Garlic bread: Slice the loaf, spread with butter and garlic, and bake for a delicious side dish.
- French toast: Use slightly stale slices to make an indulgent breakfast treat.
Storage and Freezing
- Room temperature: Store the bread in a bread box or wrapped in a clean kitchen towel for up to 3 days. Avoid storing in plastic bags, as this can make the crust soft.
- Freezing: To freeze, wrap the bread tightly in plastic wrap, then in aluminum foil, and place it in the freezer. It will stay fresh for up to 3 months. Thaw at room temperature when ready to use.
- Reheat: If the bread has become a bit stale, wrap it in foil and warm it in a 300°F (150°C) oven for 10-15 minutes.
Variations
- Whole wheat bread: Substitute half of the all-purpose flour with whole wheat flour for a heartier loaf.
- Herbed bread: Mix dried herbs, such as rosemary, thyme, or oregano, into the flour for added flavor.
- Cheesy bread: Fold in shredded cheese during the shaping step for a cheesy twist.
Why You Should Try This Recipe
This Non-Sourdough Bread recipe is ideal for those who want a reliable, tasty homemade bread without the complexities of sourdough. It’s beginner-friendly, requires minimal ingredients, and delivers excellent results every time. The texture is perfect for everyday use, making it a versatile option for meals, snacks, and even special occasions. Whether you’re new to baking or just looking for a quick and easy bread recipe, this one is sure to impress.
Conclusion
Making Non-Sourdough Bread at home is a rewarding and enjoyable experience. This straightforward recipe produces a loaf with a delicious flavor and a satisfying texture that’s perfect for all kinds of uses. From sandwiches to toast, this bread is versatile and can be customized to suit your preferences. Give it a try, and you’ll discover just how easy and delightful baking fresh bread can be!

